
Want a truly cable-free security system that comes with its own 10″ monitor so you can see everything at a glance?

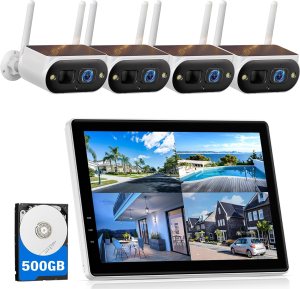
First Impressions of the Camcamp Solar Camera Outdoor Wireless with 10″ Monitor, 4MP Home Security Camera System, Solar-Powered, Color Night Vision, 10CH Expandable, 500GB Local Storage for Surveillance, 2.4 & 5GHz WiFi
The moment you unpack this Camcamp system you’ll notice how complete it feels: cameras, solar panels, and a 10″ monitor are all included so you don’t need another display. You’ll appreciate that the package aims to be plug-and-play and that the monitor gives immediate local access to feeds without relying on a smartphone or PC.
The cameras look robust and the solar panels are a reassuring size, suggesting the manufacturer intends genuinely wire-free installations. On paper, the specs read like a modern hybrid — solar power, 4MP color night vision, PIR detection and dual-band WiFi compatibility — which should cover most everyday surveillance needs.
Quick Specs Table
Here’s a quick breakdown to give you an easy reference for the most important details.
| Feature | Details |
|---|---|
| Monitor | 10″ LCD screen included |
| Camera Resolution | 4MP |
| Solar Panel Efficiency | Upgraded, listed as 95% efficiency |
| Camera Battery | 8000mAh built-in battery |
| Night Vision | Color night vision with spotlights, up to ~30 ft |
| Motion Detection | PIR sensors for reduced false alarms |
| Storage Included | 500GB local storage (expandable up to 6TB) |
| Expandability | Supports up to 10 cameras (10CH) |
| Connectivity | 2.4GHz & 5GHz WiFi; can connect NVR via Ethernet |
| App | CloudEye 365 for remote viewing and alerts |
| Weather Rating | IP66 (rain, snow, heat, cold) |
| Two-Way Talk | Built-in mic and speaker |
| Internet Requirement | Works without internet; remote access requires connection |
| Subscription | No monthly fee required for local storage |


What to Expect from the 10″ Monitor
You’ll find the 10″ monitor is both the control center and a convenient viewing device when you want local, instant access. It acts like a small NVR with a built-in display so you can mount it inside and see live camera feeds without needing a TV or computer.
The monitor simplifies daily use: it displays live streams, plays back local recordings, manages settings and pushes notifications when linked to WiFi. If you prefer to keep a physical monitor in the home office or inside near an entryway, this reduces reliance on smartphones for basic monitoring.
Monitor usability and menu
The interface is generally straightforward; you’ll cycle through camera views, open playback windows and adjust settings right from the screen. If you’re used to consumer-grade security kits, you’ll find the learning curve mild — most important features are only a few taps away.
If you want remote access, you’ll pair the monitor with the CloudEye 365 app and enable WiFi on the monitor. Once connected, you can receive push alerts and stream the same feeds to your phone.
Installation: Plug & Play, Really?
You’ll appreciate that the system is built for quick placement and minimal wiring. Each camera and solar panel assembly is meant to be mounted with no power cables, because the camera’s battery recharges via the included solar panel.
The setup process typically involves charging the camera initially so it has enough power, mounting the camera and panel in a sunlit location, powering up the monitor, and pairing the cameras to the monitor through the initial setup prompts. If you plan properly, you can have the core system running within 20–45 minutes.
Step-by-step setup tips
- Charge cameras before mounting: give them a full initial charge so you avoid mid-install interruptions.
- Mount panels with a southern exposure (in the northern hemisphere) and a tilt suited to your latitude for consistent sunlight.
- Pair cameras to the monitor first, then connect the monitor to your WiFi if you plan to use remote viewing.
- Tighten mounts and run a quick angle test using the monitor to avoid repeated re-drilling.
- Check PIR sensitivity in the app to reduce nuisance alerts from plants or small animals.

Solar Charging and Battery Life
The solar panel and 8000mAh battery are the defining features here — you’ll place cameras where they get sunlight and rely on the system to keep them powered. The company advertises an upgraded solar panel at 95% efficiency and the large battery capacity is more than many competing solar cameras offer.
In practice, battery life depends heavily on sunlight exposure, motion event frequency, and spotlight usage. If you position cameras in full sun, you can expect much longer autonomy; in shaded or seasonal conditions, the battery will act as a reserve for cloudy spans.
Realistic battery expectations
- Full sun, moderate activity: the solar input may keep the battery near topped-up and maintain near-continuous operation.
- Partial sun, regular events: you’ll see multi-day runtime without charging issues but occasional low-power warnings during stretches of rain or heavy cloud.
- Low sun, frequent spotlight/night activation: you’ll need to monitor battery levels more often, and consider panel reorientation or supplemental charging.
If you want consistent 24/7 monitoring in areas with limited daytime sun, consider adding additional panels or placing the camera where it gets the best available sunlight.
Video Quality: Daytime and Nighttime Performance
You’ll get 4MP resolution video, which strikes a good balance between clarity and bandwidth/storage requirements. Daytime footage is sharp enough to capture faces and license plates at moderate distances, while colors are vivid when ambient light is present.
Nighttime is where the color night vision and spotlight combo shines. The cameras use built-in spotlights to illuminate scenes so you get color footage up to about 30 feet in many cases. That color detail can be crucial when you need to identify a person or vehicle.
Night mode options and behavior
- Spotlight-enabled color mode: the camera will turn on LEDs to produce color footage at night, useful for identification.
- Infrared fallback: if you disable spotlights, you’ll get classic IR black-and-white night vision with extended range but less detail in color.
- Light-triggered recordings: darker areas may cause spotlights to activate when motion is detected, which can be good for deterrence but will draw more power.
If you plan to use the color spotlight feature heavily, monitor battery consumption and possibly tweak the sensitivity and activation duration to conserve charge.
Motion Detection, PIR, and Alerts
You’ll benefit from the system’s PIR sensors, which are designed to reduce false positives by sensing human-sized heat signatures rather than just pixel movement. This means fewer alerts from wind-blown vegetation or passing shadows.
When motion is detected, the system pushes instant alerts to the CloudEye 365 app (provided the monitor is connected to WiFi). Alerts usually include a snapshot or short clip and will let you quickly view the live feed and decide whether to respond.
Tuning motion detection
- Adjust PIR sensitivity: lower it to reduce nuisance alerts or raise it if you need every event captured.
- Activity zones: if the app supports it, set zones to ignore driveways or streets so you only get alerts for the exact areas you care about.
- Schedule alerts: you can usually set active hours to focus monitoring overnight or while you’re away.
PIR will usually cut down on false alarms, but real-world performance varies with ambient temperature and placement — very hot environments can reduce the contrast between a person and the background.
Two-Way Talk and Remote Interaction
You’ll be able to communicate using the built-in mic and speaker from the monitor or through the app when remote. That means you can speak to delivery personnel, warn away an intruder, or talk to a family member without being physically present.
Audio quality is adequate for short interactions, but don’t expect studio-level clarity. For most use cases like remote greetings or simple warnings, it’s perfectly functional.
Using two-way talk effectively
- Keep messages short and clear because mobile streams can suffer slight latency.
- Use the monitor for private in-house conversations since app-based talk will stream audio over your internet connection.
- Test volume and mic placement: wall mounting or glass barriers can muffle sound.
Two-way audio is a useful complement to video and can act as a deterrent if you need to make your presence known quickly.

Storage, Expandability, and No Monthly Fees
One of the biggest advantages you’ll notice is the included 500GB local storage and the system’s support for up to 6TB. You won’t be tied to a cloud subscription to retain footage, and supporting up to 10 cameras means expansion is straightforward.
Local storage allows you to keep video private and accessible without recurring costs. If you prefer off-site backups, you can still connect the monitor to your router and use cloud options if available, but it’s not required.
Practical storage management
- 500GB is good for moderate retention; if you record continuously, plan to upgrade to 2–4TB depending on the number of cameras and your retention needs.
- Configure recording modes: continuous, motion-triggered, or scheduled recording to optimize storage usage.
- Archive important clips externally if you want an extra backup or to free up space on the NVR.
This model is ideal if you’re trying to avoid monthly fees but still want reliable, expandable storage that you control.
Connectivity: 2.4 & 5GHz WiFi and Offline Use
You’ll appreciate that the monitor supports both 2.4GHz and 5GHz WiFi bands, which can give you more flexibility and performance. The cameras themselves are designed to function offline and record locally, so you don’t lose footage just because the internet blips out.
When you do connect the monitor to the internet, you’ll unlock remote app viewing, push alerts, and remote configuration. The system also allows direct Ethernet connection for the monitor if you prefer wired backhaul for increased reliability.
Recommendations for stable connectivity
- Use 5GHz for faster throughput if you’re streaming multiple cameras and have good range.
- If range is an issue, 2.4GHz can offer better penetration but at lower throughput.
- Consider placing the monitor centrally or using a WiFi range extender to minimize wireless dropouts.
Because local recording continues without internet, you won’t lose footage — this hybrid approach gives you resilience and flexibility.

Design, Build, and Weather Resistance
You’ll find the cameras are billed as IP66-rated, so they should tolerate rain, snow, heat, and cold. The housings are solid and the solar panels look proportionate to the battery, which suggests longevity in outdoor conditions.
Mounts and brackets are included for most common installation scenarios, and the hardware feels adequate for rooftop or wall installation. As with any outdoor device, periodic maintenance like wiping the solar panel and checking seals can extend lifespan.
Weatherproofing considerations
- Clean the solar panel periodically to maintain charging efficiency.
- Check that wiring runs or antenna connections are sealed after storms.
- Inspect the mounts seasonally, especially after high winds or ice buildup.
An IP66 rating means water entry is unlikely from splashes or heavy rain, but immersion or extreme physical damage is beyond the spec.
Real-World Performance Scenarios
You’ll want to know how this system behaves in typical home setups. For driveway monitoring, the color night mode makes identifying vehicles and license plates easier within the 20–30 ft range. For yard and perimeter surveillance, the PIR detection helps you focus alerts on human activity.
If you set cameras to cover wider areas, you’ll trade some detail for coverage; consider adding extra cameras for blind spots, since the system supports up to 10 channels.
Common deployment examples
- Front porch: clear identification of persons and packages, useful two-way talk for deliveries.
- Driveway: good for catching cars and people exiting/entering, especially during the day.
- Backyard/perimeter: solar placement needs thoughtful positioning for long-term sunlight exposure.
Most users will be satisfied with typical home security coverage, while those needing long-range or ultra-high-resolution footage might look for specialized alternatives.
App Experience: CloudEye 365
You’ll use the CloudEye 365 app for push notifications, remote live view, and managing camera settings. The app provides convenience and remote control, though app responsiveness can depend on your internet speeds and mobile device.
Users report straightforward pairing and typical app features like playback, screenshot, and two-way talk. As with many security apps, occasional firmware and app updates will tweak features and stability.
App functionality tips
- Keep firmware updated via the monitor to benefit from improvements.
- Use secure passwords and two-factor authentication if available to protect access.
- Familiarize yourself with playback controls so you can quickly retrieve clips when needed.
The app complements the local monitor experience and provides that off-site access you may want during travel or if you’re away from home.
Privacy and Security Best Practices
You’ll want to secure the system since it stores sensitive footage. Local storage reduces exposure to cloud risks, but you still need to secure your network and device access.
Change default passwords, enable encryption on your WiFi network, and keep firmware up to date. If you connect the monitor to the router, limit port forwarding unless you know what you’re doing and set strong credentials.
Easy security steps
- Set a unique, strong password for the monitor and app account.
- Use WPA3/WPA2 on your WiFi and avoid open guest networks for hub devices.
- Regularly check camera firmware and apply updates from the monitor menu.
Following these steps keeps your system private and minimizes the chance of unauthorized access.
Troubleshooting Common Issues
You’ll occasionally encounter typical problems like weak WiFi, solar undercharging, or app connectivity hiccups. The good news is most of these are solvable with simple adjustments.
Weak signal often means repositioning the monitor or adding a WiFi extender. If a camera won’t charge, ensure the panel is clean, connected, and angled for sunlight. App issues can often be fixed by restarting the monitor or re-pairing the device.
Quick fixes checklist
- No live view: check monitor WiFi and camera pairing, reboot both devices.
- Low battery: inspect solar panel orientation and clean the glass surface.
- Frequent false alarms: lower PIR sensitivity or restrict activity zones.
A little troubleshooting knowledge makes daily operation smooth and predictable.
Pros and Cons
You’ll want a clear summary to weigh whether this system matches your needs. Below are concise points to help you decide.
Pros:
- Complete package with 10″ monitor included.
- Solar-powered cameras with 8000mAh battery reduce wiring needs.
- 4MP resolution and color night vision for useful detail.
- Local 500GB storage with expandability up to 6TB and support for up to 10 cameras.
- IP66 weatherproofing and two-way audio for interactive monitoring.
- No mandatory subscription fees for local recording.
Cons:
- Solar efficiency depends on placement and climate; heavy shade can reduce reliability.
- Spotlight-based color night vision consumes additional battery.
- App experience and firmware updates may vary, affecting usability until patched.
- If you need very long-range or ultra-high-resolution imaging, this system may not match specialized wired solutions.
How It Compares to Wired and Cloud Systems
You’ll find this system hits a practical sweet spot between entirely wired installations and cloud-first cameras. Compared to wired NVRs, you get easier installation and flexibility with solar power. Compared to cloud-only cameras, you keep local ownership of footage and avoid monthly fees.
If you want full-time high-bandwidth recording and professional-grade analytics, wired systems can be better. If you prioritize simplicity and no subscription costs for most home use cases, Camcamp’s solar system is an appealing choice.
Choosing based on priorities
- If you prioritize simplicity and minimal cabling: go with this solar system.
- If you need enterprise-level analytics or 24/7 ultra-high-resolution recording: consider wired alternatives.
- If you want cloud backups: you can still supplement local storage with cloud services, but it’s optional.
Who Should Buy This System
You’ll benefit from this product if you want a robust, mostly maintenance-free home security system that avoids monthly fees and extensive wiring. It’s ideal for homeowners, renters with permission to mount outdoors, cabin owners, and small business operators who want visible deterrence and reliable local recording.
If you live somewhere with limited sunlight year-round, or you need distant, long-range coverage beyond the advertised 30 ft color night vision, think carefully about placement or consider a hybrid approach (mixing wired and solar cameras).
Tips for Getting the Best Results
You’ll get the most from this system by optimizing placement and settings. Here are practical tips to keep your system reliable and useful.
- Mount solar panels unshaded and at an angle appropriate for your latitude.
- Set PIR zones to ignore common false alarm sources like roads or trees.
- Use motion-only recording during busy hours to save storage.
- Keep firmware and app updated and use strong passwords.
- Add extra storage if you have several cameras or long retention requirements.
- Test two-way talk and speaker levels after installation to ensure audibility.
These small actions will improve uptime, reduce false alarms, and preserve battery life.
Final Thoughts and Recommendation
You’ll find the Camcamp Solar Camera Outdoor Wireless with 10″ Monitor, 4MP Home Security Camera System, Solar-Powered, Color Night Vision, 10CH Expandable, 500GB Local Storage for Surveillance, 2.4 & 5GHz WiFi to be a compelling option if you want a mostly wire-free, expandable security solution that emphasizes local control and zero recurring storage fees. The combination of a dedicated monitor, solar charging, PIR detection, and color night vision makes it practical for everyday home surveillance needs.
If your priority is convenience, privacy, and a setup that’s accessible for non-technical users, this Camcamp system is worth serious consideration. With proper placement and sensible configuration, you’ll have a dependable, low-maintenance security solution that keeps your property under watch without constant subscriptions or complex wiring.
Disclosure: As an Amazon Associate, I earn from qualifying purchases.